Embird Tutorials
I share with you tips and free tutorials while I'm in the process of learning Embird Editor, Studio and Font Engine and Embird Cross Stitch! I have listed links to free tutorials that I found very helpful, along with my notes and a design I did after each tutorial to see if I can apply what I've just learned - the designs are free! (.pes for now)
Tutorial freebies will be available at my group Inside Embird: http://groups.yahoo.com/group/inside_embird/
Easy Applique Face - Mini Lesson

This was my first digitizing tutorial ever! (2006) I'm totally addicted to Embird and since I've learned so much from all the Yahoo Groups and extremely clever people like Carolyn Keber, Amy Webster and the rest who always answered my questions (and I had/have MANY!), this is my way of 'giving back' Please feel free to share this mini tutorial with anyone!
I did this simple 5-sided polygon shape applique and added a face!
This is what you will learn in this FREE tutorial!:
You will learn how to
• Set you hoop size
• Create Outline Object using Embird Shapes
• Create Outline Object using a Border
• Shortcuts to copy&paste, generate stitches, finish object
• Change colours of objects in the Objects Bar (or window)
• Select more than one object
• Merge another EOF design with the existing one
• Group or join objects together.
• Center design in your workspace
• Convert column from outline (column=satin stitches)
• Use the Applique Object with the Shape feature in Embird to achieve the
same result
If you don't want to do the tutorial, download the design in .pes format (it's free!) -
- Go to the FREE DESIGNS file @ Mbrodri-Inn Yahoo Group
Redwork Tutorial
 Highly Recommended!
I can still remember how excited I was when I found this tutorial! This tutorial will not only teach you how to do redwork, but you will also learn how to import a jpg/bmp and how to edit and resize it before you can even THINK about digitizing! (which I did not know!)
One of the things I learnt here, which I now use everyday, is to press the number 3 key on your keyboard before you draw your next line! This will tell you where the last/beginning node is located. I thought this was SO cool!
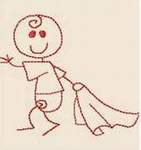
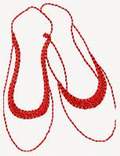
Download shoes .pes file Look at the Redwork Stickbabies I did after this tutorial .... and not ONE jump stitch! Quite an achievement for me - you can do it too!
Get this tutorial at Joanne's Embird Studio Club, - Go the the Files Section, Embird Studio Lessons, and look for "Apple Annie Redwork Lesson"
Angle Exercise / Begin and End Points
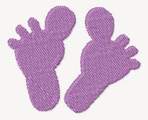 When I started with Embird this tutorial meant a lot to me. By knowing how and where to put your start and end points, you can minimise jumps, and if there must be a jump, to make the end point close to the start point of the next object.
Download my Bigtoe Fill in .pes format which I did after doing this tutorial. You can also download the .eof file for this design.
I strongly recommend this tutorial by Joanne Marshall from JMM Embroidery and Digitizing. You will find Joanne's tutorial at her Embird Studio Club Group in the
» Files folder
» go to Embird Studio Lessons
» - once there, download the file angleexercise.zip
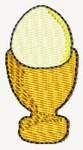 Another one of Joanne's tutorials I recommend: CREATING DIMENSION & SHADING IN A DESIGN
Download eggcup.eof file or eggcup.pes
Joanne have a special way of explaining things! I just 'click' with her way. This is a very good tutorial where she shows you in more than one way how to create something special. From a 'flat' design to one that has depth and 'character'.